How to Create an Online Payment Profile
These step-by-step instructions will guide you through setting up your online payment profile in BTU’s new online payment system, and will show you how to set up automatically recurring payments, and how to sign up for paperless billing.
1. Log in, or Enroll in Online Billpay
Log in to your existing BTU online account, or if you are not already an online customer, enroll in online billpay, and then log in to your BTU online account.
2. Click “Recurring Payments / E-Bills”
Once you’re logged in to your BTU online account, click on the “Recurring Payments / E-bills” button on your account summary screen.
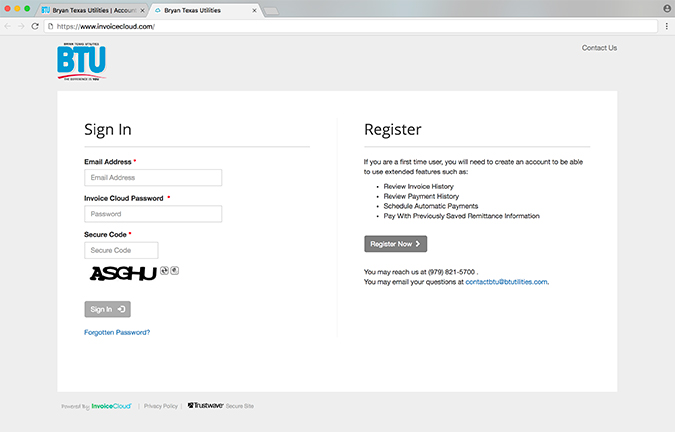
3. Sign In, or Register Your Payment Profile
Follow the instructions to sign in to the new payment system, or if you are a first-time visitor, follow the instructions to register in the new system.
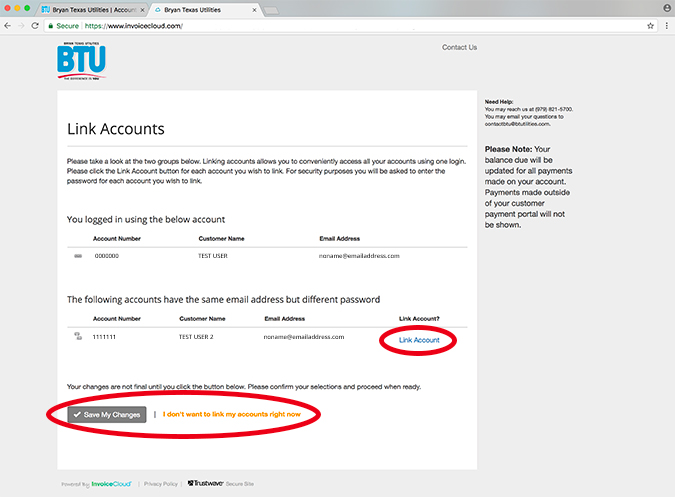
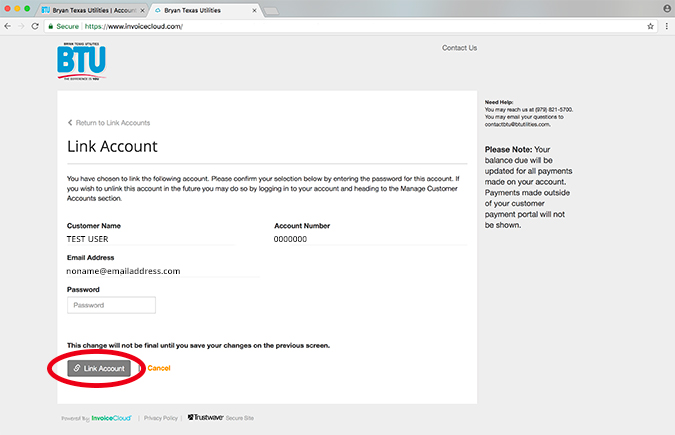
4. Linking Your Accounts
(This is only an option if you are registering multiple BTU accounts in the new payment system. If you only have one account, please skip to Step 5.)
Each account is tied to the email address that is entered when the account is registered in the new payment system.
However, if you have multiple different accounts that are going to be registered in the new payment system AND you are going to use the same email address to register these accounts, then you will have the option to link all of your accounts into one dashboard so you can manage them more efficiently. You will see this screen to begin linking your accounts when you go to register your second account and then again on registering all future accounts. You are not required to link your accounts.
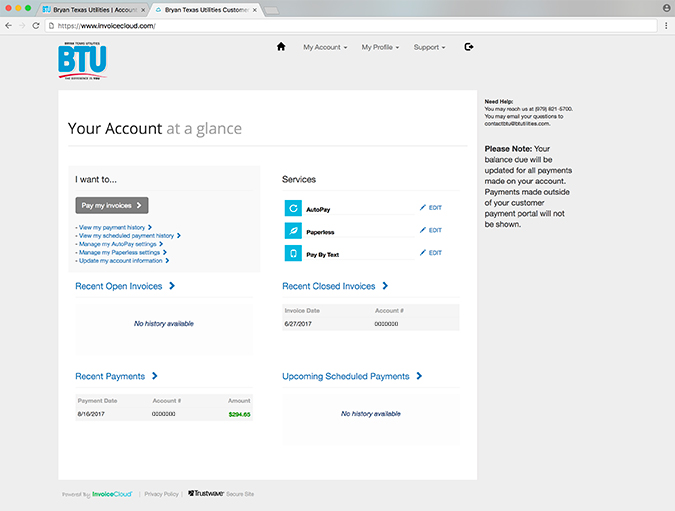
5. You’ve Made It to Your Dashboard
Welcome to your BTU payment profile dashboard. From here, you can make online payments by credit card or e-check, set up automatically recurring payments, manage paperless billing, enable paying by text, schedule upcoming payments, and lots more. In the next section, we’ll find out how to use all of these great features.